Honey Buttermilk Bread

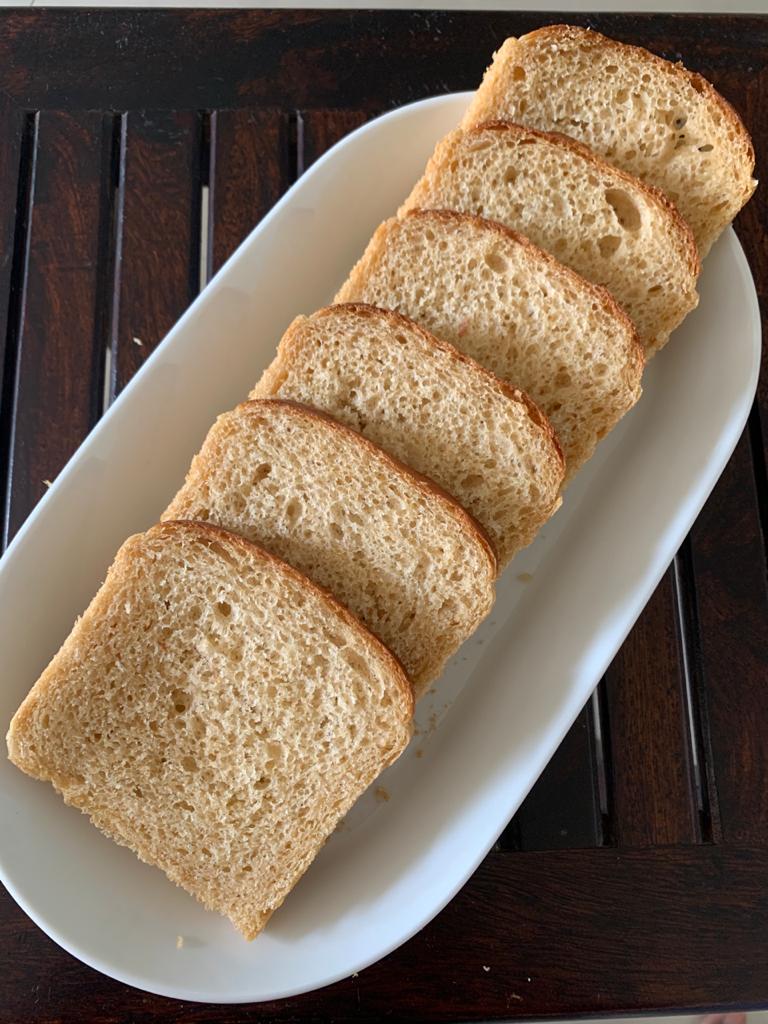
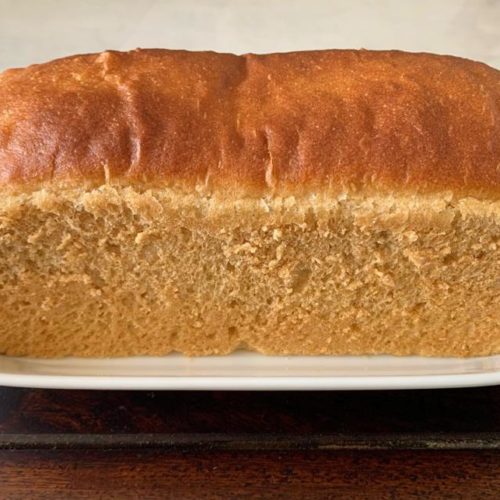
I try to make different breads each time. I looked up a lot of recipes for Honey Buttermilk Bread and found most to contain all purpose flour. So I thought of trying it out with a combination of whole wheat flour and semolina and I was very pleased with the outcome. The bread was soft and delicious. It’s neither too sweet nor too tangy. A perfect balance of flavours. I sent a loaf to a friend and got a lot of compliments from her family too! So you should definitely try this one out!

Honey Buttermilk Bread
Equipment
- OTG
- Bread Mould/ Tin
Ingredients
- 250 grams Whole Wheat Flour
- 250 grams Fine Semolina
- 1 ⅛ tsp Salt
- 2 tsp Instant Yeast
- 2 tbsp Honey
- 2 tbsp Olive Oil
- ⅜ tsp Baking Soda
- 50 – 60 ml Lukewarm Water
- 250 ml Lukewarm Buttermilk
- 1 – 2 tbsp Milk (for Milk Wash)
Instructions
- Add all the ingredients (excluding oil, water and buttermilk) to a big mixing bowl and mix well. Now add lukewarm buttermilk little by little to get a slightly sticky dough.
- Add water only if the dough feels dry or stiff to the touch.
- Transfer this dough to a kneading surface and knead for 10 – 12 minutes using the stretch and pull method. You can add the olive oil little by little to help you with the kneading process. The dough will be sticky. Don't be tempted to add flour. Keep kneading till the dough turns into a smooth, soft dough.
- Form this dough in the shape of a ball, tucking the ends beneath. Place it in a well oiled bowl and move the dough around a bit so that it gets oiled as well. Cover the bowl with a damp cloth or with a cling wrap and keep it in a warm place. Allow it to double in size (usually takes an hour).
- Once the dough has doubled, gently punch it to release all the gases and knead it for a minute or two.
- Roll out the dough in the shape of a rectangle and then fold it tightly like a log. Seal the ends well. Place the log in a well oiled bread tin /mould. Apply a little milk or oil on top so that it doesn't dry out. I have used a 9*3.5*3.25 inch tin here. Allow the dough to double in size or reach the brim of the tin (ideally around 30 minutes).
- In the last 10 minutes of the waiting time, preheat your oven to 180 degrees Celsius. You can again gently apply a milk wash to the loaf and bake it for 40- 45 minutes till the crust turns golden in colour. If the top of the loaf starts to brown too much, just cover it with aluminium foil.
- Remove the bread from the oven and apply butter on top. After 4-5 minutes take it out of the tin and allow to cool on a wire rack for 2-3 hours before slicing it.

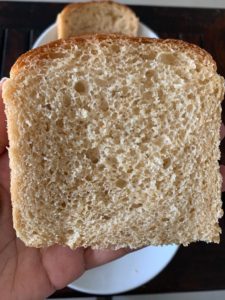
- Slice and serve. Just look at the crumb :-).

Notes
- Use Baarik Rava /Chirotti Rava for this bread. Do not use the roasted variety.
- Add water / liquid component gradually. Do not add it all at once. It’s better to go by judgement than by the exact measurement and your judgement will get better with experience.
- Use a serrated knife to neatly slice the bread. Allow the bread to cool completely before slicing!
If you try out this recipe do post your comments on my blog. You can also post on Instagram and tag me @my.loaf.story


My posts may contain affiliate links. If you buy something through one of those links, you won’t pay a penny more, but I may earn a small commission. Thanks!
